
You’ve spent weeks, maybe months, researching the perfect home espresso setup. You’ve mastered the art of the 2:1 ratio, your latte art is starting to look like actual hearts instead of abstract onions, and you’ve finally found that one local roaster who can do no wrong.
But then, one morning, you notice something. The pump on your machine sounds a little strained. The water flow from the group head is uneven. Maybe the temperature isn’t quite reaching that “sweet spot” anymore.
You haven’t changed your beans. You haven’t changed your grind. The problem is internal, and it is invisible. It’s called scale.
Scale is to an espresso machine what cholesterol is to an artery. It is a slow-building accumulation of minerals that, if left unchecked, will eventually choke your machine to death. In this guide, we are going to look at the chemistry of scale, why “just using vinegar” is a bad idea, and how to perform a deep clean that will keep your shots tasting as fresh as the day you unboxed your machine.
1. The Mineral Problem: Why Water is Your Best Friend and Worst Enemy
To understand scale, we have to look at your water. As we discussed in Water Quality: The Invisible Ingredient in Your Coffee, water is not just H2O. It is a complex solution containing minerals, primarily Calcium and Magnesium.
When you heat water inside the copper or stainless steel boiler of your espresso machine, a chemical reaction occurs. The heat causes the calcium and magnesium to precipitate out of the liquid and solidify. These minerals stick to the heating elements, the walls of the boiler, and the tiny “gigleur” valves that regulate pressure.
Over time, this “limescale” acts as an insulator. Because the heating element is covered in white, chalky rock, it has to work twice as hard to heat the water. This leads to:
-
Temperature Instability: Your machine can’t stay at the 93 degrees required for perfect extraction.
-
Pressure Loss: Clogged pipes mean your pump can’t hit the 9 bars of pressure needed for crema.
-
Taste Issues: Old scale can break off and enter your cup, adding a chalky, metallic tang to your espresso.
2. The Backflush: Your Daily Defense
Before we get into the heavy “descaling” process, we need to talk about the Backflush. This is the most basic part of your maintenance routine, and it addresses the “coffee side” of the machine rather than the “water side.”
Every time you pull a shot, coffee oils and tiny particles (fines) are pushed back up into the group head and the 3-way solenoid valve. If these oils sit there, they go rancid and bitter.
A backflush involves using a “blind filter” (a basket with no holes) and a specialized detergent. The detergent dissolves the oils and flushes them out through the discharge valve. This is a critical step in Calibrating Your Espresso: The Dialing-In Process; if your group head is dirty, your “dial-in” will always taste bitter, no matter how good your beans are.
Pro Tip: You should backflush with plain water every single day after your last shot, and use detergent once a week.

3. Descaling: The Deep Chemistry
Descaling is the process of removing the mineral buildup inside the boiler. This is the “surgery” of espresso machine maintenance.
The Vinegar Myth:
Many people will tell you to just run white vinegar through your machine. While vinegar is an acid and will dissolve scale, it is a terrible choice for espresso machines. It is not strong enough to remove heavy buildup, and it leaves behind a pungent, acetic smell that can take 50 flushes to remove. More importantly, the acetic acid in vinegar can be too aggressive on certain rubber gaskets and soft metals.
The Professional Choice:
Modern descaling powders are usually based on Citric Acid or Sulfamic Acid. These are “inhibited” acids, meaning they are designed to eat the calcium and magnesium while leaving the metal and rubber components of your machine alone. They are more efficient, easier to rinse, and odorless.
4. Step-by-Step: The Deep Clean Protocol
If your machine allows for home descaling (check your manual first, as some high-end dual-boiler machines require professional servicing), here is the standard protocol:
-
Preparation: Remove your water filter (if you have one in the tank). Dissolve your descaling agent into a full tank of warm water.
-
The Initial Fill: Run the water through the group head and the steam wand until you see the colored descaling solution coming out.
-
The Soak: Turn the machine off and let it sit for 20 to 30 minutes. This is where the chemistry happens. The acid needs time to “chew” through the rock-hard mineral layers.
-
The Flush: Turn the machine back on and run the remaining solution through.
-
The Rinse: This is the most important part. Fill the tank with fresh, filtered water and flush the entire volume through the machine twice. You want to ensure there is zero acidic residue left in the boiler.
By doing this every 3 to 6 months (depending on your water hardness), you ensure that your Science of Coffee Body: What Creates That Syrupy Mouthfeel? remains consistent, as the machine can maintain the precise thermal mass needed for heavy body.
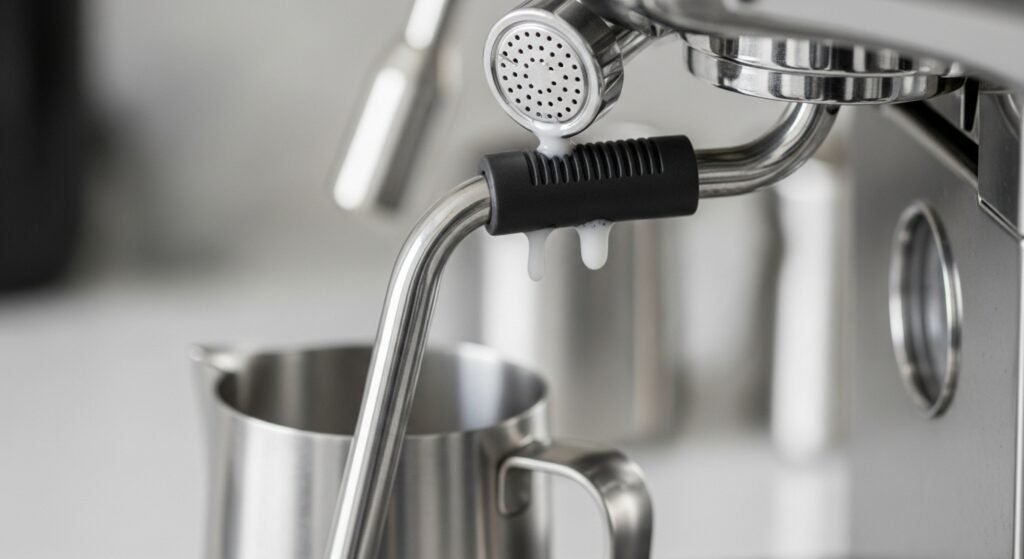
5. Cleaning the Steam Wand: No More “Milk Stones”
The steam wand is the most neglected part of many home stations. Every time you steam milk, a small amount of milk is “sucked” back into the wand when you turn it off. If you don’t “purge” and wipe the wand immediately, that milk cooks onto the hot metal, forming what we call “milk stones.”
These stones harbor bacteria and can eventually block the tiny holes in your steam tip.
The Deep Clean:
Once a week, soak your steam wand in a pitcher of warm water mixed with a specialized milk-frother cleaner. This enzymatic cleaner breaks down milk proteins and fats that regular soap can’t touch. After soaking for 15 minutes, purge the wand for 10 seconds to blow out any loosened debris.
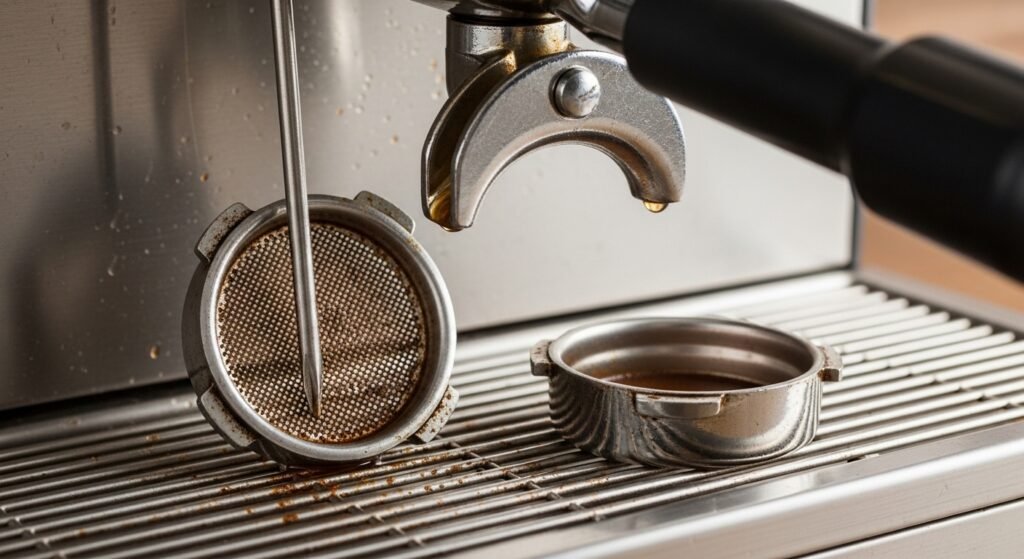
6. The “Shower Screen” and the Basket
If you look up into your group head, you’ll see a metal mesh called the “shower screen.” Its job is to distribute water evenly over the coffee puck.
Over time, coffee oils act like glue, trapping fines in the mesh. This leads to “channeling”—where water finds a path of least resistance through the coffee, leading to a sour and thin espresso.
The Maintenance:
Once a month, use a screwdriver to remove the shower screen. Soak it and your portafilter baskets in a bowl of warm water and backflush detergent. You will be amazed (and slightly disgusted) by the amount of brown sludge that comes off an “invisible” part of your machine. A clean screen is the secret to a professional-level extraction.
7. Grinder Maintenance: Don’t Forget the Engine
A clean machine is useless if your grinder is full of old, rancid oils. As we know from The Science of the Burr: Why Blade Grinders are Killing Your Coffee, the precision of your grind is everything.
Coffee beans are full of oils. These oils stick to the steel or ceramic burrs and eventually go rancid, adding a “fishy” or “stale” taste to your fresh beans.
The Clean:
Use a specialized grinder cleaning tablet (made of food-safe binders and grains) once a month. Run them through the grinder like you would coffee beans. They will “scrub” the oils off the burrs without you having to disassemble the entire unit. For a deep clean, every 6 months, open the grinder and use a vacuum to remove the “dead space” coffee that gets trapped in the exit chute.
8. Preventive Care: Preventing Scale Before it Starts
The best way to clean your machine is to make sure it never gets dirty in the first place. This comes down to two things: Filtration and “Soft” Water.
-
Pitcher Filters: Using a Brita or Peak Water pitcher reduces the chlorine and some minerals.
-
In-Tank Softeners: Many machines come with a small resin bag that sits in the water tank. These “ion-exchange” filters swap calcium for sodium, preventing scale from forming.
-
The “Barista Water” Recipe: For the ultimate protection, many pros use distilled water and add back a precise amount of minerals (using products like Third Wave Water) to ensure perfect flavor without any scale risk.
Summary: Your Maintenance Checklist
| Task | Frequency | Purpose |
| Purge & Wipe Wand | Every Shot | Prevents milk buildup and bacteria. |
| Water Backflush | Every Day | Clears loose grounds and fresh oils. |
| Detergent Backflush | Every Week | Dissolves stubborn, rancid coffee oils. |
| Soak Steam Wand | Every Week | Breaks down milk proteins inside the tip. |
| Remove Shower Screen | Every Month | Ensures even water distribution. |
| Descaling | 3 – 6 Months | Removes mineral “rock” from the boiler. |
Final Thoughts
We often treat our espresso machines like appliances—set it and forget it. But a high-end machine is more like a musical instrument or a performance car. It requires tuning, care, and a little bit of chemistry to stay at its peak.
Cleaning your machine isn’t just about hygiene; it’s about respect. Respect for the farmers who grew the beans, the roasters who perfected the profile, and the money you invested in your hobby.
When your machine is clean, the flavors are brighter, the texture is creamier, and the experience is simply better. Don’t wait for the pump to groan or the coffee to taste like metal. Start your maintenance ritual today. Your future self—the one enjoying a perfect, velvety morning espresso—will thank you.
Happy (and clean) brewing!

Marcelo Clark combines professional industry experience with a passion for democratizing coffee knowledge. Specialist in extraction techniques and an advocate for single-origin beans, Marcelo uses this space to teach beginners how to appreciate the subtle notes of a well-crafted brew. His goal is to make learning about methods and origins simple, relevant, and inspiring for every reader’s daily routine.